What all Waterproofing should I do while constructing my new house?: A Homebuilder’s Step by Step Guide to Waterproofing
by Babu George
Originally published on May 26, 2025, 3:19 pm, updated on November 12, 2025
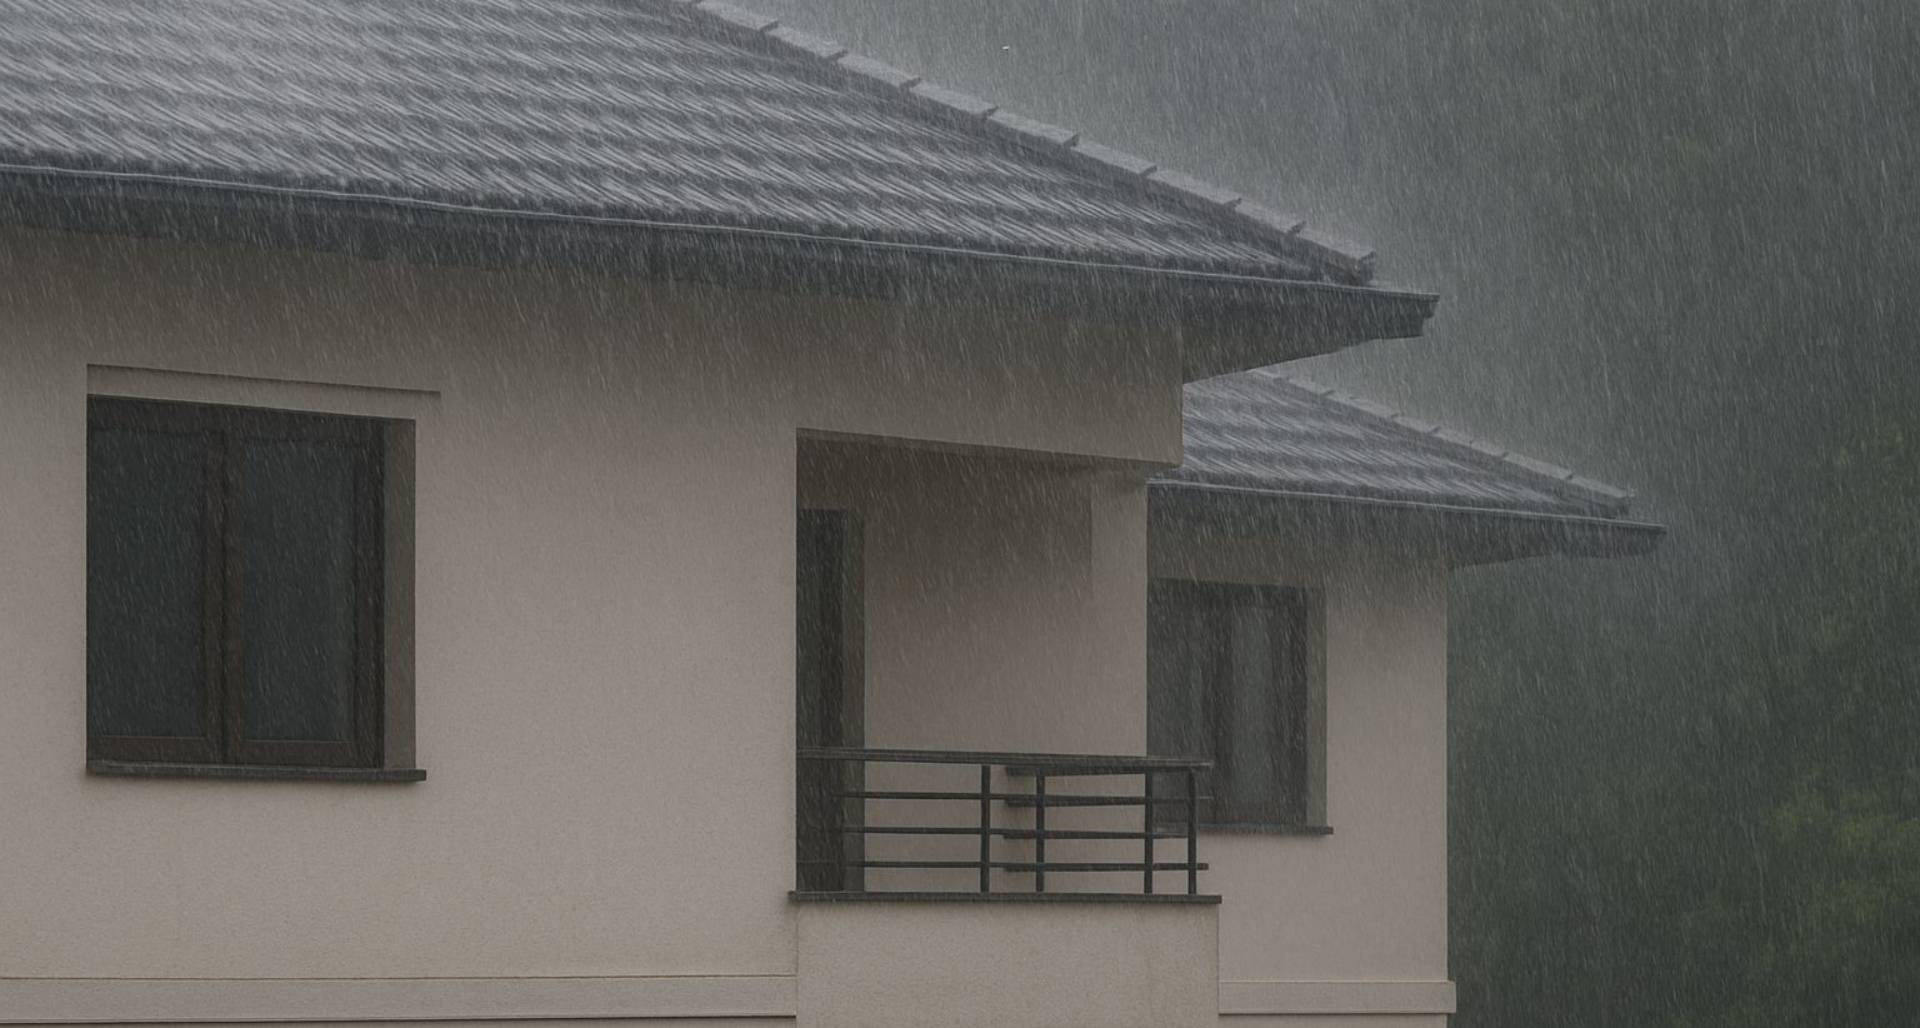
scroll downBuilding your own home is an incredible journey, a dream taking shape brick by brick. You meticulously plan every room, every fixture, every colour. But amidst the excitement of choosing tiles and designing kitchens, there’s a silent guardian your home desperately needs: Waterproofing.
For many first-time home builders, waterproofing might seem like a technical jargon, an optional extra, or something the contractor will “just handle.” This couldn’t be further from the truth. Think of waterproofing as your home’s personal raincoat and umbrella, protecting it from the relentless efforts of water to seep in and cause havoc. Ignoring it, or doing it improperly, is like building a beautiful sandcastle too close to the tide.
Introduction to Waterproofing: Your Home’s First Line of Defense
What is Waterproofing?
Simply put, waterproofing is the process of making a structure resistant to water penetration thus improving the structural life and longevity. It involves applying specialized materials or systems to create an impermeable barrier, preventing water from entering and damaging the building. This isn’t just about a quick coat of something; it’s a systematic approach to protect your investment from the foundation up to the roof which have to be done by experts in the field.
Why is Waterproofing Absolutely Critical for a New Home?
Water is persistent. It can find its way through the tiniest cracks and pores in concrete and masonry. Once inside, it becomes a destructive force. For a new home, effective waterproofing is critical because:
- Preserves Structural Integrity: Water can corrode steel reinforcements within concrete (the backbone of your structure), leading to weakening and potential structural failure over time.
- Ensures Healthy Living Environment: Dampness breeds mold and mildew, which are not only unsightly but can cause serious respiratory problems, allergies, and other health issues. A dry home is a healthy home.
- Protects Your Investment: Your home is likely your biggest financial investment. Waterproofing safeguards its value by preventing costly repairs and maintaining its aesthetic appeal.
- Enhances Durability: A home protected from water damage will last longer, requiring fewer major repairs throughout its lifespan.
The Heavy Price of Neglecting Waterproofing: Long-Term Cost Implications
Skipping or skimping on waterproofing might seem like a way to cut costs initially, but it’s a decision that almost always backfires, leading to far greater expenses down the line. Consider these:
- Cost of Repairs: Fixing water damage is expensive. This can include repairing cracked walls, re-plastering, repainting, replacing damaged flooring, and even rectifying structural issues.
- Damage to Interiors: Seepage can ruin expensive paint, wallpaper, wooden furniture, carpets, and electrical systems.
- Increased Utility Bills: Damp homes are harder to heat and cool, leading to higher energy consumption.
- Reduced Property Value: A home with visible dampness, mold, or a history of water leakage will fetch a significantly lower price in the market.
- Health Costs: Treating respiratory illnesses caused by mold and mildew can add up.
The truth is, the cost of comprehensive waterproofing during construction is a tiny fraction (often just 1-3%) of the total building cost. The cost of not doing it can be manifold, not to mention the stress and inconvenience.
Key Areas in Your House That Demand Waterproofing
Water can attack your home from multiple fronts. Here’s a detailed look at the critical zones that need robust waterproofing:
-
Foundation and Basement:
-
- Why: This is where your house meets the ground. Soil moisture, rainwater, and fluctuating water tables can exert immense hydrostatic pressure on foundation walls and basement slabs. Without a scientific waterproofing, water can easily seep into basements, capillary action on walls, making them damp, unusable, and a source of moisture for the rest of the house. It can also weaken the foundation itself.
- Common Methods: Liquid-applied membranes with Bituminous & cementitious chemistry, and proper drainage systems (like French drains) are crucial.
- Latest Methods: “Mirror C” Grooves, “U-Joint” etc are the latest and innovative foundation waterproofing systems developed by UniPro® Waterproofing to scientifically protect from water damage.
-
Roof/Terrace, Sunshades:
-
- Why: Your roof is the primary shield against rain. Flat roofs or terraces or sunshades are particularly vulnerable as water can pool on them. Slope roofs either aren’t exempted as they are also prone to water ingress due to reduced cement water ratio while casting. Even a small leak can lead to significant damage to ceilings, walls, and interiors below.
- Common Methods: Liquid-applied polyurethane or acrylic membranes, with a slope plastering/ screed ensuring proper slope for water drainage are essential.
- Latest Methods: UniPro® Waterproofing team checks the terrace area for integrity, reinforce vulnarable areas (if required) and given a protective waterproofing cover is provided immediately followed by suitable sloping methods.
-
Bathrooms and Wet Areas (including Showers, Toilets, Balconies & Laundries):
-
- Why: These areas are constantly exposed to water from showers, taps, and splashes. Water can seep through tile grout, gaps around pipes, and floor-wall junctions, leading to dampness in adjacent rooms, peeling paint, and mold growth.
- Common Methods: Applying flexible, liquid-applied waterproof membranes to the floor and walls (up to a certain height, especially in shower areas) before tiling is critical. Special attention should be paid to corners and pipe penetrations.
- Latest Methods: We recommend waterproofing at sunken levels and another level of waterproofing after PCC upto 300mm only. There are specific detailing developed by UniPro® Waterproofing to protect these areas, including how to place tiles etc keeping the waterproofing angle in mind. You may contact our customer service for more information and support.
-
Water Tanks (Overhead and Underground):
-
- Why: Both overhead and underground water tanks store large volumes of water. Any leakage can lead to water wastage, dampness in surrounding areas, and contamination of stored water (especially for underground tanks if external groundwater seeps in). For concrete tanks, waterproofing also prevents the concrete itself from deteriorating due to constant water exposure.
- Common Methods: Food-grade polymer-modified cementitious coatings or epoxy coatings are used for internal waterproofing to ensure water potability. External waterproofing for underground tanks is also necessary.
- Latest Methods: Food grade epoxy coating is upgraded to high quality, hi-build coating which can withstand even a 25 bar pressure. You may contact us at customer service for more information and support.
-
Exterior Walls and Balconies:
-
- Why: Exterior walls are battered by rain and environmental moisture. Balconies, being exposed, are like mini-terraces. Cracks in plaster or improper sealing can allow water to penetrate, causing damp patches internally, peeling paint externally, and efflorescence (those ugly white, powdery deposits).
- Common Methods: Applying waterproof exterior paints, and treating balconies with liquid membranes before tiling etc. Proper sealing of joints and cracks is also key.
- Latest Methods: Using water-repellent additives in plaster, or plastering the wall with polymer plasters, protecting all flush walls with water repellent treatment, using breathable paints which lasts more than 15 years. Do contact us in case you need support.
-
Kitchen and Utility Areas:
-
- Why: While not as intensely wet as bathrooms, kitchens and utility areas have sinks, dishwashers, and washing machines, making them prone to spills and leaks. The area beneath the sink and around plumbing outlets needs protection.
- Common Methods: Applying a waterproof coating to the floor and a small section of the walls (dado area) before installing cabinets and tiles can prevent long-term damage from minor leaks.
- Latest Methods: Focus given more on the kitchen top wall joints, Sink Joints apart from the common waterproofing method mentioned above.
-
Toilet Sharing Walls, Wardrobe Walls
-
- Why: In the event of any leaks, toilet sharing walls are usually the first victim for paint flaking. Wardrobe wall are usually done at full wall height where chances of dampness are more in humid tropical climates like Kerala.
- Common Methods: No treatments are currently done.
- Latest Methods: Toilet Sharing Walls up to 1.5m, full height of wardrobe walls are treated with epoxy coating which is of high quality, hi-build coating which can withstand even a 25 bar pressure. Putty and paint can be done over it post curing.
-
Tiling Balconies and Open Terraces:
-
- Why: Tiles themselves are largely water-resistant, but the grout joints between them are not. Over time, grout can crack or wear away, allowing water to seep underneath the tiles. If there’s no underlying waterproof membrane, this water will eventually find its way into the slab and the rooms below.
- Common Methods: Applying a robust waterproofing membrane before laying the tiles is non-negotiable. This creates a continuous barrier. Ensure proper slope for drainage towards designated outlets.
- Latest Methods: Tiling Balconies and Open terraces should be a well thought out decision and we provide step by step waterproofing specifications done at slab level and slope level. Tiles have to be laid with minimum 5mm adhesive and finished with UV-stable epoxy for long service life. Contact us for more information.
-
Planter Boxes and Roof Gardens
-
- Why: Planter boxes and roof gardens are wet throughout the year. If not constructed and waterproofed properly, you may have to get rid of them to save the structure.
- Common Methods: Constructing Planter boxes with brick masonry and coating them with basic waterproofing after plastering.
- Latest Methods: Planter boxes & roof gardens are to be constructed with RCC and anti root waterproofing to be done, followed by slope screeding and wall plastering, installation of drain cells etc. Contact our customer support for help and information.
-
Around Windows and Doors:
-
- Why: The junctions between window/door frames and walls are common weak points for water ingress, especially during driving rain. Improperly sealed gaps can lead to water seeping in, damaging walls, and promoting mold.
- Common Methods: Using quality sealants (like silicone or polyurethane) around frames and ensuring proper installation with flashing (if applicable) is crucial. Sometimes, a pre-emptive waterproof coating around the openings before frame installation is beneficial.
- Latest Method: Client consults with our expert team to understand the nuances so that they can take an informed decision.
What Happens If You Don’t Waterproof Properly?
Ignoring or botching waterproofing is an invitation for trouble. The consequences can range from annoying cosmetic issues to serious structural threats:
-
Common Issues:
-
- Seepage and Damp Patches: Ugly, discolored patches on walls and ceilings are the most common tell-tale signs.
- Peeling Paint and Plaster: Moisture pushes paint and plaster off the surface.
- Mold and Mildew Growth: Black, green, or white fuzzy spots that smell musty and pose health risks.
- Efflorescence: White, salty deposits on walls as water evaporates, leaving minerals behind.
- Warped Wooden Fixtures: Doors, window frames, and wooden flooring can swell and deform.
- Corrosion: Metal fixtures, pipes, and even electrical conduits can rust.
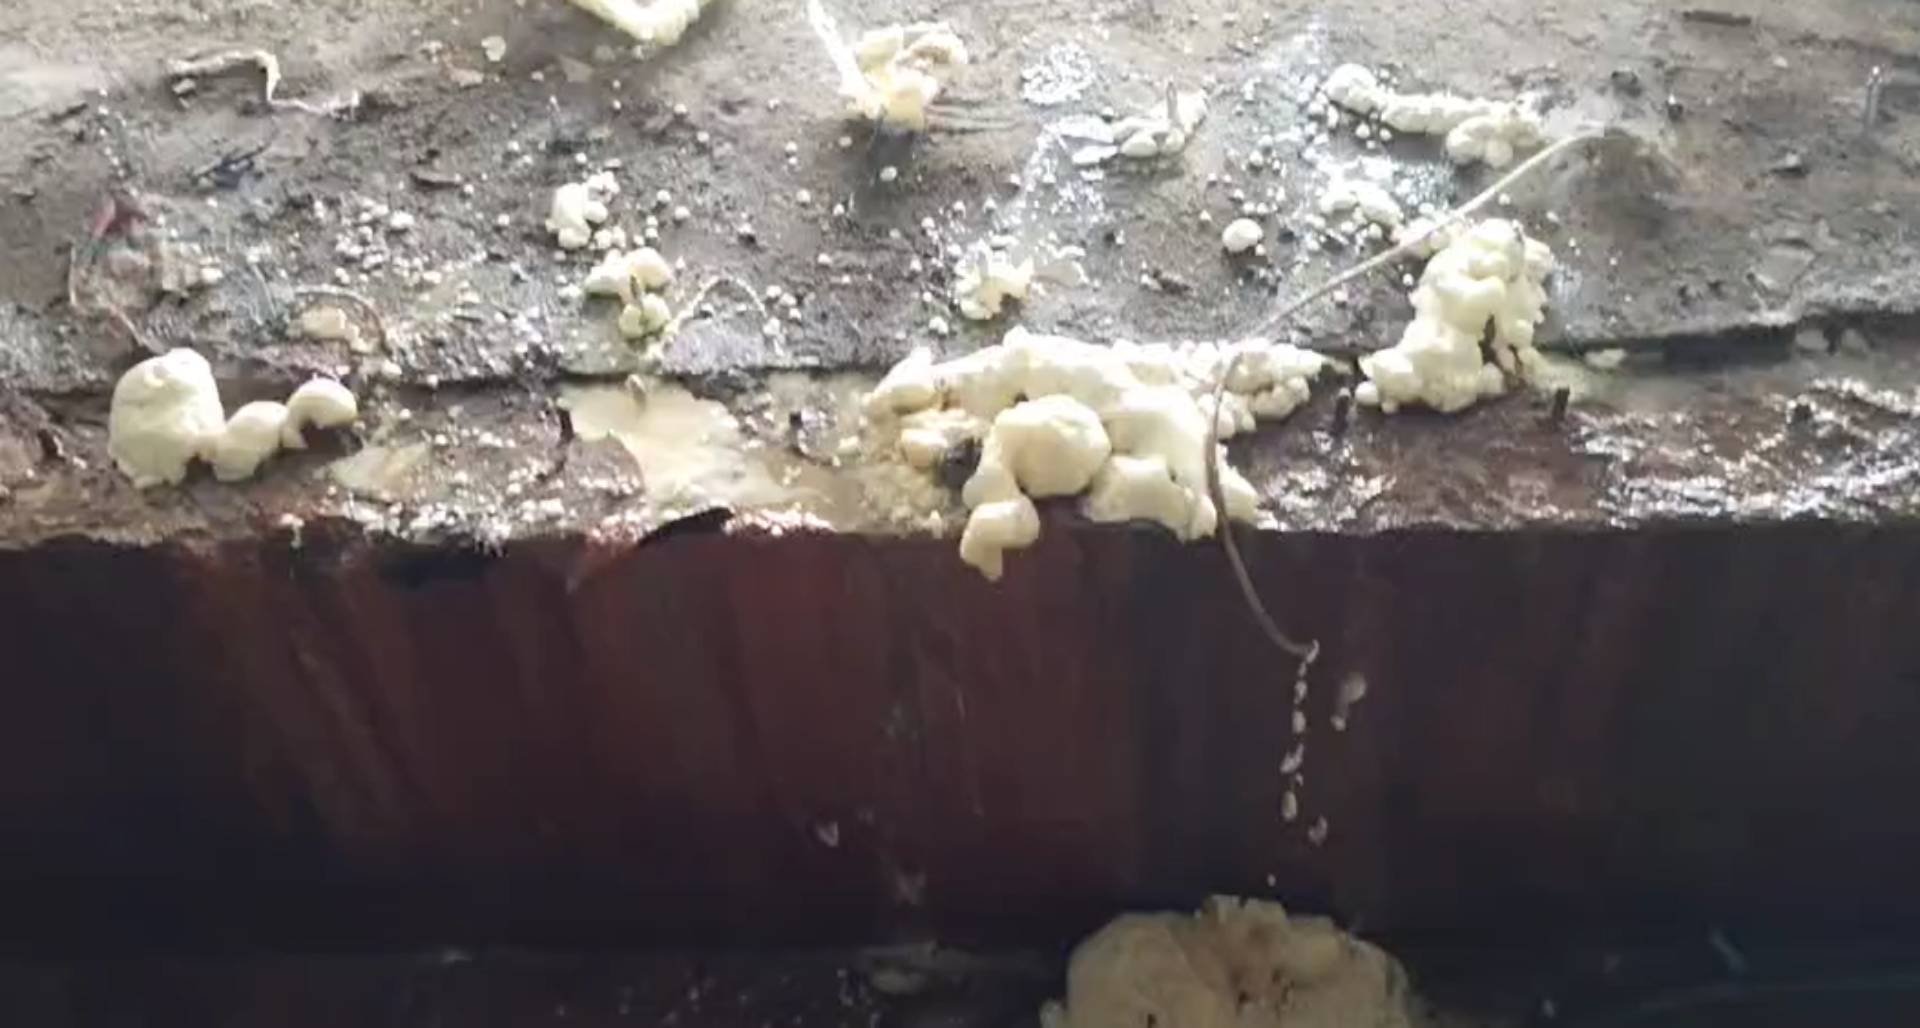
- Structural Damage: In severe cases, prolonged water exposure can corrode reinforcing steel in concrete, leading to spalling (concrete breaking away) and weakening of the structure. This is the most dangerous and expensive outcome.
Real-Life Scenarios: Waterproofing Lessons from Others
- The Case of the Damp Basement: Mr. Ashok (name changed for privacy) was thrilled with his new home, complete with a basement he planned to use as a home office. He’d relied on his general contractor for waterproofing, who volunteered for it and did a cursory job. Within the first monsoon, the basement walls were damp, and a musty smell filled the air. His files and books started getting moldy. The fix? Extensive reinforcement of retaining walls with PU, which involved drilling and replastering – a costly and disruptive process that could have been avoided with proper initial application.
- The Leaky Terrace Party Spoiler: The Jacobs (name changed for privacy) loved hosting parties on their beautiful new terrace. However, after a few heavy rains, their top-floor bedroom ceiling started showing damp patches and water stains. The “waterproofing” done by the tiler was just a thin chemical mix over the slab, which quickly failed. They had to rip up all the expensive terrace tiles, apply a proper membrane system, and then re-tile – doubling their terrace cost and causing immense frustration.
When to Do Waterproofing? A Stage-Wise Waterproofing Guide
Waterproofing isn’t an afterthought; it’s an integral part of the construction process. It needs to be done at specific stages for maximum effectiveness:
-
During Foundation and Basement Work:
-
- When: After the foundation concrete/plinth beam is cast and cured, and before backfilling the soil around the plinth beam.
- What: Apply external waterproofing coating to plinth beam or retaining walls and the basement slab. Install drainage systems.
-
Before Laying Bathroom/Kitchen/Utility Flooring:
-
- When: After the basic civil work in these areas is complete, plumbing lines are laid (and tested for leaks!), but before the tiles or final flooring is installed.
- What: Apply liquid membranes to the floor slab and up the walls to the specified height (e.g., shower area upto 3 feet, other areas 300mm). This is often called “sunken slab waterproofing” or “wet area membrane application.”
-
Before & After Plastering Walls (for certain treatments):
-
- When: Before Plastering – For external walls, sometimes water-repellent additives are mixed into the cement plaster.
- When: After Plastering – Water repellent spray treatment done post curing and before painting.
-
Before Laying Terrace Tiles:
-
- When: After the structural slab for the terrace is cast and cured, and before the final tiling or finishing layer is applied.
- What: Apply a robust waterproofing system (e.g., liquid membrane treatment with Acrylic or PU. Ensure proper slope and drainage outlets are created before or integrated with the waterproofing layer.
-
Before Installing External Cladding/Paint:
-
- When: After the external plastering is done and cured.
- What: Apply high-quality waterproof spray treatment on walls. If using cladding, clad with hi quality adhesives laying a bed of 5mm and ensure claddings are well embedded. Seal all joints and gaps meticulously to avoid water ingress through joints.
Waterproofing Stories from the Trenches: The Good and The Bad
- The Smart Savers – The Varmas: Anil and Sunita Varma(names changed for privacy) were building their first home on a tight budget. Their contractor suggested cutting corners on waterproofing to save money. However, Anil did his research and read horror stories online. He insisted on allocating a proper budget for comprehensive waterproofing, hiring a specialist applicator for critical areas like the basement and terrace. Years later, their home stands dry and beautiful, while their neighbour, who built at the same time and skipped on thorough waterproofing, is constantly battling leaks and spending a fortune on repairs. The Varmas “spent” a little extra initially but “saved” a lot in the long run.
- The Unfortunate Oversight – The Alis: The Ali(name changed for privacy) family was excited about their new home with a lovely balcony garden. They assumed the tiler would handle the balcony waterproofing. The tiler did a quick waterproofing coating with a popular brand. Within a year, water started seeping from the balcony into the living room below, damaging their expensive wooden flooring and causing mold on the wall. The cost to fix the leak, replace the flooring, and repair the wall was nearly five times what proper balcony waterproofing would have cost initially.
Your Waterproofing Checklist: Practical Tips and Waterproofing Mistakes to Avoid.
Empower yourself with knowledge to ensure your waterproofing is done right:
What to Ask Your Waterproofing Contractor/Applicator:
- What type of waterproofing system do you propose for each area (basement, roof, bathrooms, etc.)? Why is it suitable?
- What specific materials and brands will you be using? Ask for detailed product information.
- What is the warranty period for the materials and the workmanship?
- What is your experience with these types of applications? Can you provide references?
- How will you prepare the surface before application? (Surface preparation is key!)
- How will you test the waterproofing after application? (e.g., flood testing for bathrooms/roofs).
- Who will supervise the work?
Common Mistakes to Avoid during Waterproofing your home:
- Treating it as a DIY Job: Proper waterproofing requires skill and knowledge of materials. Don’t try to do it yourself or leave it to untrained labor, your contractor, painter or tiling person.
- Using the Right Materials at Wrong Place: Different areas require different types of waterproofing materials. A one-size-fits-all approach doesn’t work.
- Using Mesh or Preformed Membranes in Toilets: Toilet areas are usually small and have constructed areas. Though sheet membranes are good, and mesh can increase tensile strength (which is not required in non sun exposed areas), they are prone to leaks if not done properly.
- Skipping the Primer: Primers ensure proper adhesion of the waterproofing membrane to the substrate. Skipping this can lead to failure. Kindly note that basic acrylic cement-based coatings does not need a primer.
- Ignoring Surface Preparation: Surfaces must be clean, dry, and free of loose particles for the waterproofing to bond effectively.
- Not Protecting Vulnerable Points: Joints, corners, pipe penetrations, and drains are critical points that need extra attention and proper detailing.
- Applying Too Thin a Coat: Ensure the specified thickness of the membrane is applied using correct dosage specified by the manufacturer.
- Damage After Application: Once waterproofing is done, ensure it’s not damaged by subsequent construction activities (e.g., plumbers, electricians, tilers, masons). Protection layers might be needed.
- Rushing the Curing Time: Waterproofing materials need adequate time to cure and achieve their full strength.
Ensuring Waterproofing Quality and Your Peace of Mind:
- Supervision: If you’re not technically savvy, consider hiring an independent waterproofing consultant or a knowledgeable site engineer to oversee the work. At the very least, be present during critical stages.
- Checklists: Prepare a simple checklist for each area based on the contractor’s proposal and material specifications.
- Documentation: Keep records of materials used, warranty cards, and any test reports. Take photographs at various stages.
- Certification/Reputable Applicators: Choose applicators who are certified by reputed waterproofing material manufacturers.
A quick note on materials: you’ll hear terms like liquid-applied membranes (polyurethane, acrylics – great for seamless coatings on roofs and bathrooms), Preformed membranes (APP (Tar), HDPE, EPDM based sheets, often used for foundations and some roofs), cementitious coatings (cement-based products modified with polymers, good for wet areas and tanks), and crystalline waterproofing (chemicals that penetrate concrete and form crystals to block pores). The right choice depends on the area, exposure conditions, and budget. An expert can guide you.
Final Note: Waterproofing is Not Optional, It’s Essential
Building a home is a labor of love and a significant financial commitment. Waterproofing is not a luxury or an area to cut corners; it’s a fundamental requirement for the longevity, safety, and comfort of your home.
Crucially, don’t assume your civil contractor, painter, plumber, or tiler is a waterproofing expert. While they play vital roles, specialized waterproofing application requires specific knowledge, skills, and attention to detail that only dedicated professionals or well-trained teams possess. Insist on specialists for critical waterproofing tasks.
By understanding its importance, planning for it at the right stages, and ensuring quality application, you’re not just preventing leaks; you’re investing in the health of your home and your family, ensuring your dream remains a source of joy, not a constant battle against dampness. Proactive planning today means long-term peace of mind for years to come.
※※※